Try Hack Me - Learn Linux
Walkthrough of the room Learn Linux on TryHackMe. Let’s go!

Before we start, it’s important to remember that the best way to learn is by understanding our mistakes. So, you don’t need to feel bad if you have some problems solving this machine, mainly if you are just starting your journey in technology or trying to start hacking (even if it’s a machine that is considered as beginner level), this doesn’t mean that you need to understand and know everything. The goal is just to learn what we don’t know and improve what we know or heard about. I tried to be simple and straight to the point in my comments because I didn’t want this article to be tiring to read. I hope it helps!
The tasks above have a complete explanation, tutorial and are just to follow the instructions. So, I didn’t make any comment to focus on the tasks that you can have some problems to do or understand. But, I encourage you in some tasks to test more to fix what was taught and understand better some tutorials or tools.
Task 1-Introduction
Task 2-Methodology
Task 3-SSH Intro
Task 4-Putty and ssh
Task 5-Basic Command Execution
Task 9-touch
Task 13-Intro
Task 15-»
Task 16-&&
Task 17-&
| Task 19- |
Task 20- ;
Task 22-Intro
Task 23-A bit of background
Task 28-cp
Task 34-Intro
Task 37-nano
Task 38-Basic shell scripting
Task 39-Important Files and Directories
Task 40-Installing packages (apt)
Task 41-Processes
Task 42-Fin
After looking at tasks that I decided not to comment on because I think they are quite complete and do not need additional comment, let’s go to our write up!
Task 6: Manual Pages and Flags
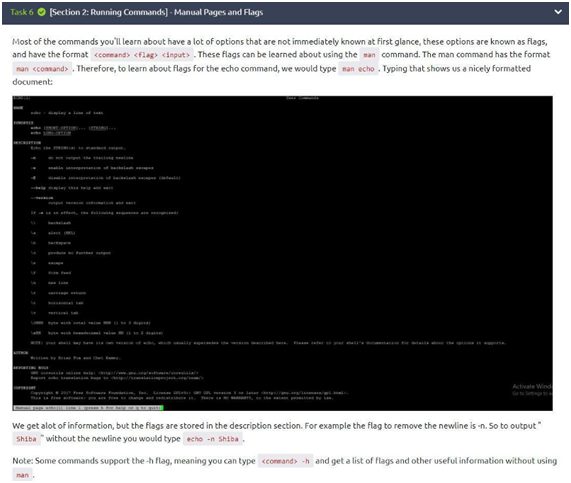
As we saw in the task, we have to use the echo command to return something (hello in that case) and since we want it not to generate a new line, we need -n. So, to be able to do this correctly, just type in the answer: “echo -n hello” and confirm. Easy, right?

Task 7: ls
The “ls” command is really important and is often used in Linux. In this task, we will have to answer two questions, let’s go!
For the first question, we have the answer in the explanation itself, since it is said that the command “ls -a” shows all files. So “-a” is the answer to the first challenge.
In the second question, we have to think a little bit more, as it has not been explained to us how to display in long list format, but previously we saw that the “help” command can really help us since it offers a kind of guide. Typing “ls –help”, we find that the “-l” command gives us what is asked in the second question (use the long list format). Therefore, “-l” is the answer to the second challenge.
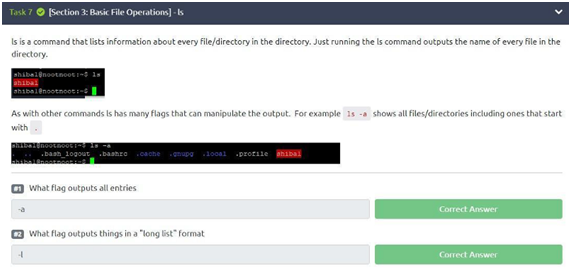
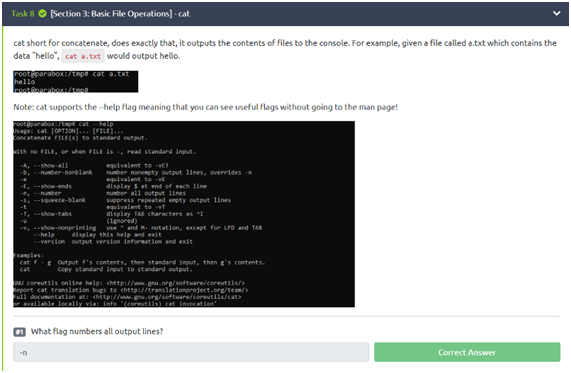
Task 8: cat
For this task, we only have to answer one question. Let’s do it!
Well, think with me. In the statement, we were told that we can use the “–help” flag. So, we can use the “cat –help” command to generate all the cat commands. From that command, we define which command we need to complete your task. When generating the command, we observe that the “-n” flag generates all the output lines. Therefore, “-n” is the answer to the challenge.
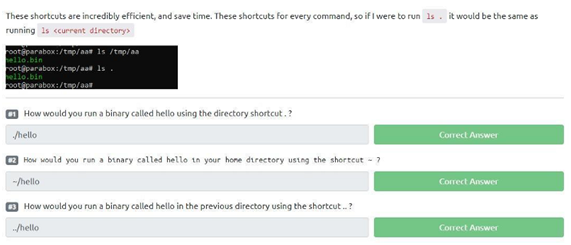
Task 10: Running A Binary
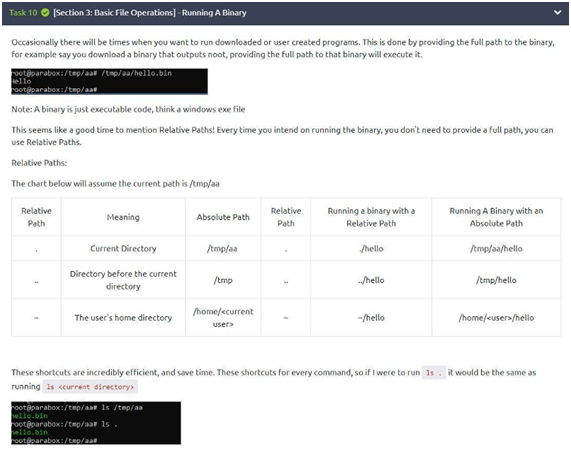
In this task, we have 3 challenges to answer!
The first question asks how you would run a binary called hello using the directory shortcut “.”? Well, as we see in the table given, we have to execute it using the “./hello” command.
The second wants to know how you would run a binary called hello in your home directory using the “~” shortcut? Well, as we see in the table again, you just need to use “~/hello”.
The last question wants to know how you would run a binary called hello in the previous directory using the shortcut “..”? Well, just use the command ../hello. Intuitive, isn’t it?
Task 11: Binary Shiba1
To solve this challenge, just create the file using the “touch” command (as we saw earlier since the touch command creates files). Therefore, we will create the “noot” file using the “touch noot.txt” command. After creating, we will use the command “./shiba1” (we saw the part of the relative paths previously) and the password will be generated: “pinguftw”. Just type it and submit!

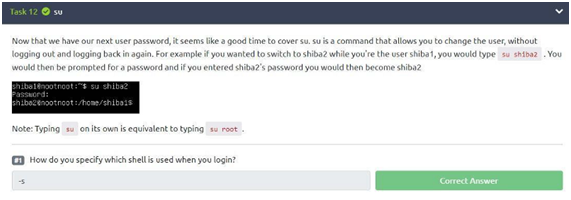
Task 12: su
In this challenge, we have to answer a question, but as we don’t know much about the su command how about typing “su –help” to have a list of commands and guide us through this path? Let’s use it! When typing “su –help” we have the command “-s (–shell)” saying that the flag allows us to specify which shell to use. So, the answer is “-s”.
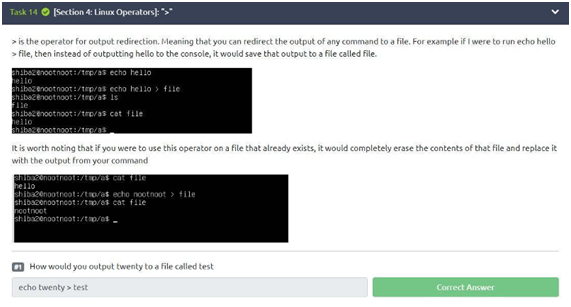
Task 14: >
In this task we have one question to answer, let’s go! Well, to answer this question, pay attention to the statement, the command, and the result of the images shown. To clarify better, let’s make an example: typing the command “echo pleaseleaveaclap> test.txt” and after that, we type the command “cat test.txt” what will be returned? That’s right, pleaseleaveaclap. So, to generate what is requested, just run “echo twenty> test”!
Task 14: $
In this task, we have two questions! Well, to answer the first one, you just need to use the “export” command, accompanied by the variable name (nootnoot) and value (1111). Therefore, the answer is
“export nootnoot = 1111” (based on the export < varname> = < value> command given in the statement).
To answer the second question, we need to remember the task of relative paths. We have to use the “echo $ HOME” command to find the correct path: “/home /shiba2”
Task 21: Binary shiba2
To do this task, go to the prompt and execute the command “export test1234 = $ USER”. After executing this command, we have to execute “echo $ test1234” and the return will be “shiba2”. After this return, we will execute “./shiba2” to find the desired password. Did you notice that in this challenge, several commands interconnected to reach the solution? Now, just take the password returned “happynootnoises” and submit it to proceed.

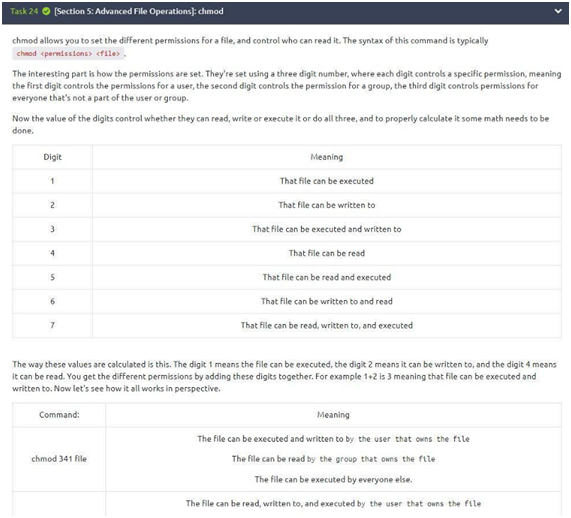
Task 24: chmod
Well, after this extensive synthesis of important concepts, we have two questions to be answered in the task!
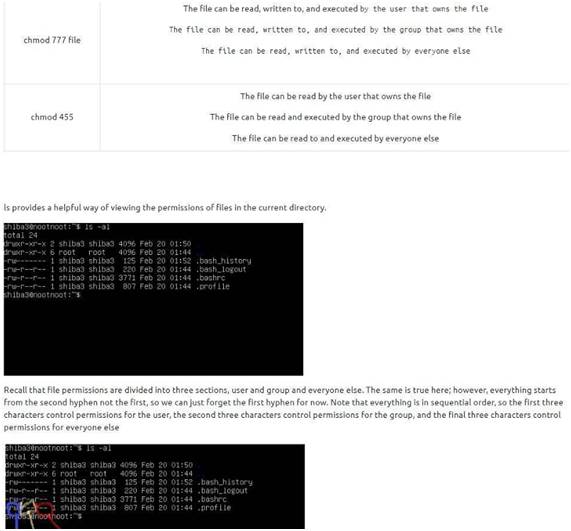
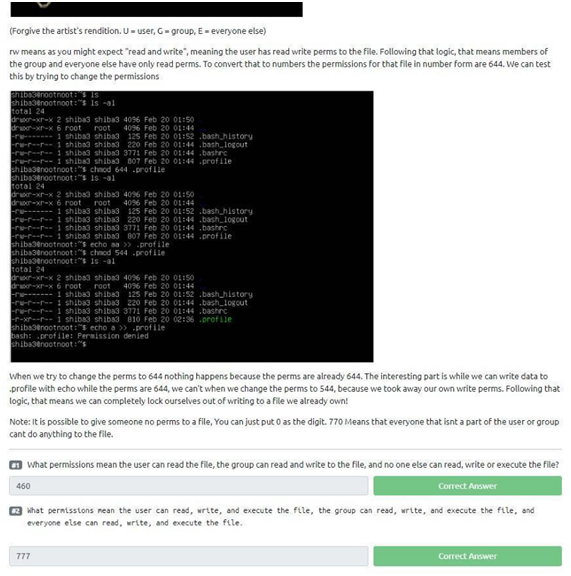
To answer the first question, analyze the table given. We see that digit “4” allows us to read the file, digit “6” allows us to read and write, and “0” as said at the end of the text allows us to block the reading, writing, or execution of the file by someone else. So we have “460” as an answer. Let’s answer the second question!
In the second question, again, we have to analyze the table given in the statement, because if we observe “chmod 777”, we can see our answer. When using “777”, everyone has the same permissions and possibilities (read, execute and write).
Task 25: chown
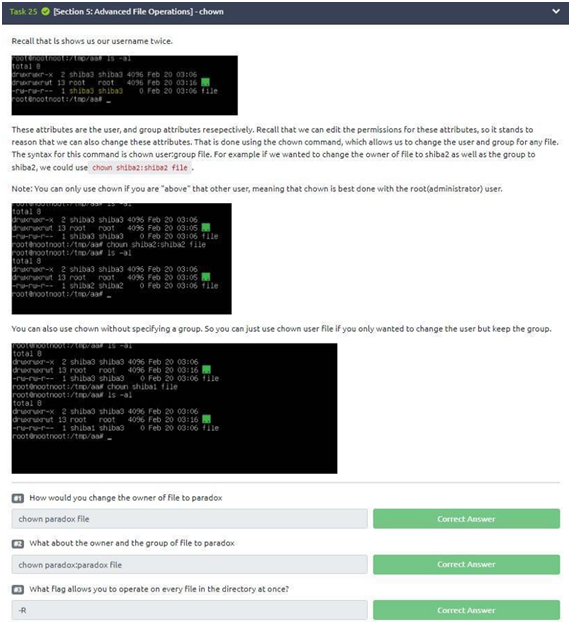
Given the explanations, let’s go to the three questions we have for this task. The first is simple, as we saw recently, just use the “chown” command. With that, we can change it by typing “chown paradox file”. In the second question, we will use the chown command again, but with a slight change. We have to change the group too, so the command “chown paradox: paradox file” does what is asked and we can move on to the last question.
The last question you will probably have problems if you don’t have much contact with Linux, but again, we will use “–help” to help us. Using the command “chown –help” we have that “-R” does exactly what we want: operate on all files in the directory at once. So the answer is: “-R”.
Task 26: rm
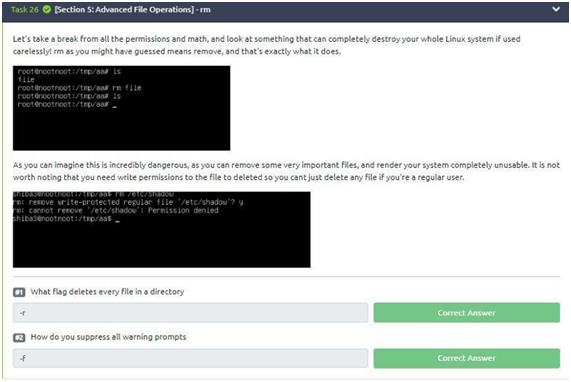
Before we start, I think it’s interesting to do the examples that were given in the statement (please, do it!). After testing it, let’s go to the two questions we have in the task!
To answer the first question, we will use “–help” again to help us. Using the command, “rm –help” will generate a guide containing our answer. As we can see, “-r” removes all files from a directory, so that is the answer. Let’s go to the second question!
Without doing anything other than what we have already done, we will continue using “rm –help”. When analyzing our options, we observe the flag “-f” which is the answer to our problem because “-f” suppresses the prompt warnings.
Task 27: mv
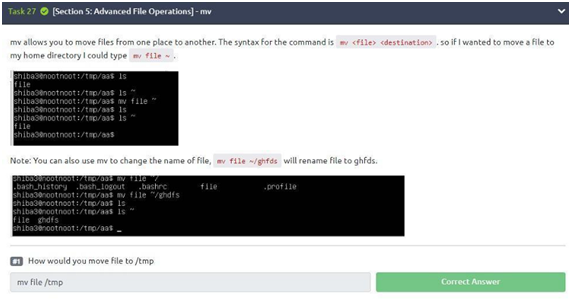
In this task, we have a very simple question to answer: How would you move the file to “/ tmp”? Simple, right? Just use the command mv file to the destination, which in this case is “/ tmp”. So, the answer is: “mv file /tmp. ”
Task 29: cd&&mkdir
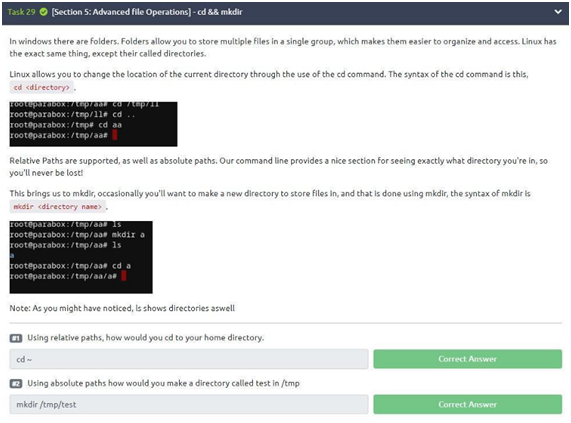
After testing and fixing what was said, let’s go to the two questions for the task. The first asks us: “Using relative paths, how would you cd to your home directory?” Well, as the home directory is accessed using “~” we can use the command: “cd ~”. In the second question: “Using absolute paths, how would you make a directory called test in /tmp?” To do this just use the “mkdir” command to create a directory called test in tmp. So, just type the command “mkdir /tmp/test” to answer the question.
Task 30: ln
In this task we have only one simple question: “How can we link /home /test /testfile to /tmp /test? Simple, we just need to use the “ln” command, why ? Because “ln” is a unix/linux command used to create a link (shortcut or symbolic link as it is better known) between files in the file system. So, the answer is: “ln /home/test/testfile /tmp/test”.

Task 31: find
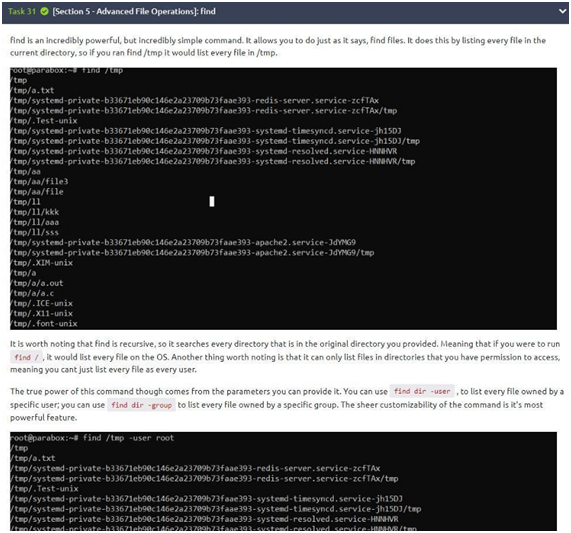
As you can see, it is essential to know this command well, so study hard to fix it. Let’s go to the three questions that we have in the task!
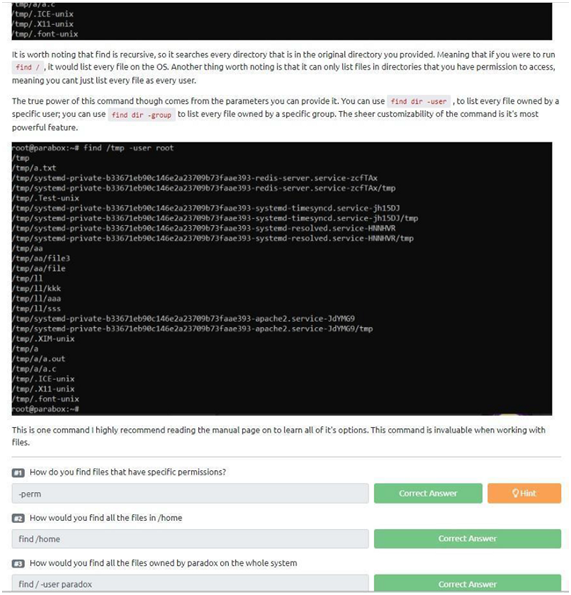
1-“How do you find files that have specific permissions?” Well, to know this just use the command “-perm” (it comes from the word permission).
2-“How would you find all the files in /home?” We can use the “find /home” command to find it in /home. So “find /home” is the answer.
3-“How would you find all the files owned by paradox on the whole system?” To find the files for a specific user we need to determine them. We will use the command: “find / -user paradox” to find all files owned by the user.
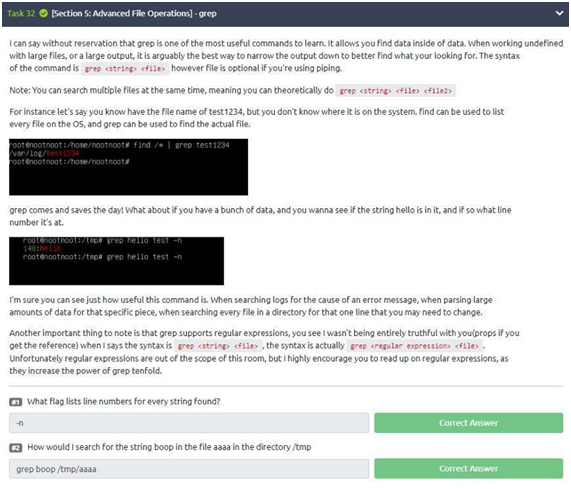
Task 32: grep
After testing and understanding more about grep, let’s go to the task questions:
1-“What flag lists line numbers for every string found?” As we can see in the explanation of the grep command, the answer is: “-n”.
2-“How would I search for the string boop in the aaaa file in the directory /tmp ?” Well, for that we will need to use the provided syntax grep string file. So, we will use the command: “grep boop /tmp/aaaa”
Task 33: Binary Shiba3
| In this task, we have a challenge that will require a little more than we have learned. The challenge question is: “What is the password for shiba4?” To find the password, we will need to find files for this user, so we type the command: “find / | grep shiba4”. After running this process, we can verify that shiba4 is located in “/ etc/shiba/shiba4”. With that, we will use the command “cd /etc/shiba” and after pressing enter we will use the command “ls”. After this process, we will use the command “ls -lsa” to see the properties. |
Now, let’s use the command “cat shiba4” to return what we want. Therefore, the password is “test1234”.
(We have other options to get this answer if you think it is necessary to look for another way on the internet).

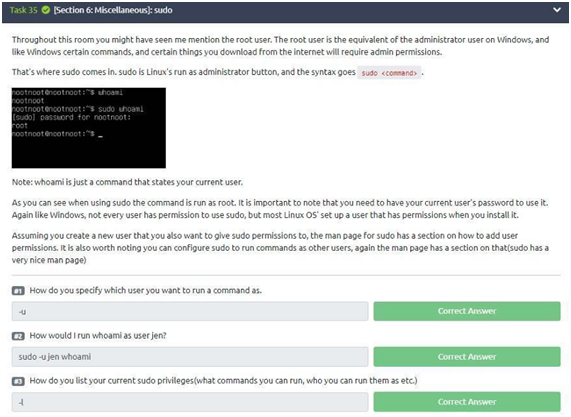
Task 35: sudo
Let’s go to the three questions in the task.
1-“-u” (u from a user).
2-“sudo -u jen whoami” (jen specifies the user and whoami allows us to run).
3-“-l” (is used to list privileges)
If you have any doubts use the “sudo –help” command to check.
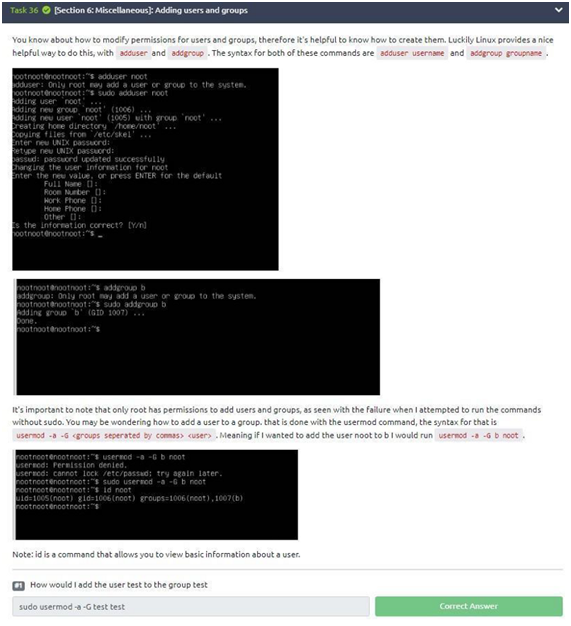
Task 36: Adding users and groups
We just need to use the “sudo usermod -a -G test test” command.
Task 43: The true ending(bonus challenge)
First, we’ll use the “sudo -l” command to conclude that none of the users are allowed to use the sudo command, but let’s continue our search. The next step is to search for files that allow each user with the command: “find / -user < insert the user here> -type f 2 » /dev/null”
When performing this search, we noticed that Shiba2 has an interesting file: “/var/log/test1234” How about analyzing the file permissions using the “ls -l” command?
Running “ls -l /var/log/test1234” command, we can see that this file belongs to shiba2 and can only be read by the owner of the file and the group. Therefore, we need to use su to “become” shiba2 before we open the file. To do this, just use the “su shiba2” command and enter the “pinguftw” password.
After this process, we can open the mysterious file using the command “cat /var/log/ test1234” and see that the generated output looks like a password, so how about changing the user again? That’s right, let’s use “su nootnoot” command and then enter the password we found. Now, let’s check this user’s permissions using “sudo -l” command. When we execute this command, we realize that this user is root (root has all the privileges). Now it’s easy!
We can read the file and find the flag, just using the command: “sudo cat /root/root.txt” and the flag to solve the final problem will be there!

Conclusion
To conclude, I hope this writeup helped and explained some tasks to you better, but in some cases, it really didn’t have many things to add other than the author of the machine. But, I hope you have learned, cleared your doubts and if it’s possible, leave a clap on the article, thank you!